Figure 2.1 Setup parameters
This chapter describes how to use N-Paint's Setup mode to define certain N-Paint parameters.
In this chapter, we'll describe how to use the N-Paint Setup menus to configure N-Paint.
In this Chapter
The Setup menu lets you define several parameters which affect the "look and feel" of N-Paint. While the default settings for N-Paint are those that most users are comfortable with, you may want to customize them. You can modify N-Paint Setup parameters at any time, the changes you make take effect immediately.
The Setup Menu
Setup Parameters
To view the Setup parameters, (CLICK-L) on the Setup menu item. The following menu appears:
Save Unpaint
Specifies whether to save unpaint on all painting and drawing operations. If this feature is turned off, you may see a slight performance improvement. You can also turn off the unpaint feature if you are low on memory.
Confirm Enabled
If Confirm Enabled is on, a confirmation menu will appear whenever you perform a potentially destructive operation (such as erasing the entire canvas).
Use I/O LUT
Enable Input/Output Look-Up Table. You can use the Look-Up table to determine how color values are mapped between different color depths. N-Paint has a 16-bit architecture, which means that each pixel has 4 components (RGBA), each of 16 bits, for a total of 64. When you load or save image which have different color depths, like an 8-bit image, color values must be mapped between the two color depths.
Debugger Enabled
When the Debugger is enabled, an additional option is displayed on any error dialog box, allowing you to enter the LISP debugger.
Use Mouse Buttons
Determines how the mouse interacts with N-Paint:
Horiz Stretch
Controls the horizontal stretch factor to be used for displays with non-square pixels. This is automatically set when the canvas is created. You can override the specified stretch factor and specify whether or not stretch factor is used.
Numeric Keypad
When this feature is enabled, a numeric keypad appears when you (CLICK-L/M/R) on a number edit box.
Otherwise, you edit numeric values like this:
Unpaint Parameters
The unpaint parameters define how N-Paint's undo feature works; (CLICK-L) on the Unpaint Parameters button to display the following menu:
Startup Options
Startup options define how N-Paint configures itself on startup. (CLICK-L) on the Startup Options button to display the following menu:
Horiz Stretch
Specifies the amount by which individual pixels are "stretched" (if horizontal stretch is enabled by pressing the Horiz Stretch button).
Fast Warp Size
Specifies the quality for any operations using the warp ink. A lower value produces images "truer" to the original, while higher values produce "chunkier" results.
Color Warning
If selected, a warning message is displayed if you select an invalid color for one of the following color-spaces:
Menu Mode
Specifies the level of menu complexity:
Derez Width
Specifies the width of the canvas when displayed in de-rez mode (used, for example, to pull a matte using a lower resolution version of the currently displayed canvas).
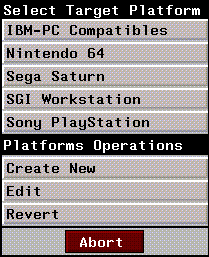
Target Platform
Specifies the gain and gamma values to be used for the N-Paint display. (CLICK-L) on this field to reveal a pop-up menu, listing your choices:

Figure 2.6 Platform Settings dialog
Platform
Gamma (RGB)
Gain (RGB)
PC
1.0 1.0 1.0
1.0 1.0 1.0
N-64
1.0 1.0 1.0
1.0 1.0 1.0
Saturn
1.0 1.0 1.0
1.0 1.0 1.0
SGI
1.7 1.7 1.7
1.0 1.0 1.0
Playstation
1.0 1.0 1.0
1.0 1.0 1.0
Auto Highlight
When you click on a slot in the palette in Color Reduction, pixels in the image which map to that slot are automatically highlighted when Auto Highlight is on.
Auto Remap
When toggled on, images are automatically remapped to the current palette. Otherwise, you must remap the images manually.
Dither Method
Specifies a method for dithering colors in color-reduced images. (CLICK-L) on the Dither Method field for a pop-up menu listing possible methods for dithering.
VRAM Editor Parameters
Stop at failure?
When this option is selected, the VRAM Editor will return an error message when it is unable to place a tile using the Best Fit algorithm. Otherwise, the offending tile will not be placed, but no error message will appear.
Use DOS filename?
When this option is toggled, TIM file names are truncated to eight characters in accordance with DOS file name requirements. For example, CharacterSprite.lbm will end up as Characte.TIM.
Additional Setup Parameters
At the far right of the screen, an additional area controls the display channels and the current memory and disk usage:

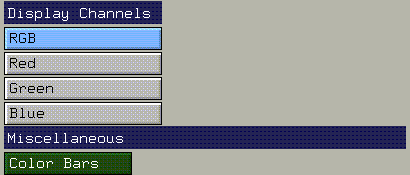
Display Channels
The Display Channels section allows you to specify which channels of an image are displayed. Note that this does not affect which channels of an image are modified by a particular operation.
Tablet
The Tablet section appears in the Setup menu only if a tablet is hooked up to the machine on which N-Paint is installed:
Color Bars
The color bars option lets you generate a canvas of standard color bars. (CLICK-L) on the Color Bars button to select which option you want:
 Another fine product from Nichimen documentation!
Copyright © 1996, Nichimen Graphics Corporation. All rights reserved.